Wildix
These instructions describe how to connect your TIM Plus system to Wildix, allowing you to analyse your Wildix calls in the same way as standard phone calls.
Support files
Ensure the following support files exist in the /config/ folder of the TIM Plus application:
Wildix.TDT
Wildix.TDS
Wildix.DBS
If you don't have these files in place, please contact support.
Cloud Connector Wizard
To quickly and effortlessly establish your Wildix connection, utilize the TIM Plus Cloud connection wizard. It directly connects to your system, configuring Server to Server application and Callback URL properties for you.
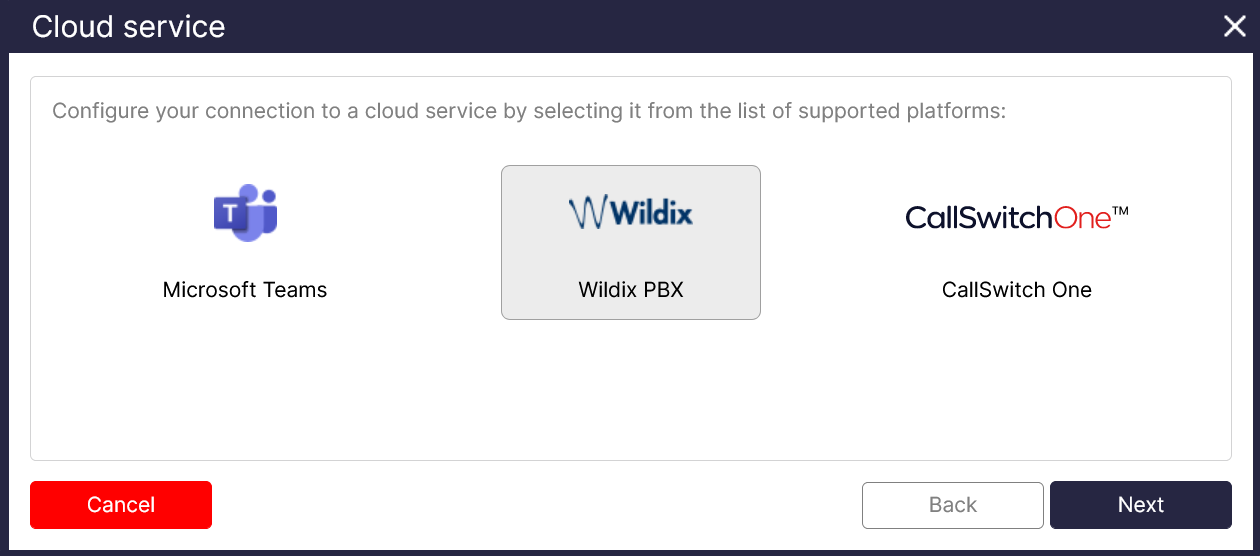
In the TIM Plus directory, you can include a Cloud Service by pressing Add and selecting Cloud service and then selecting Wildix.
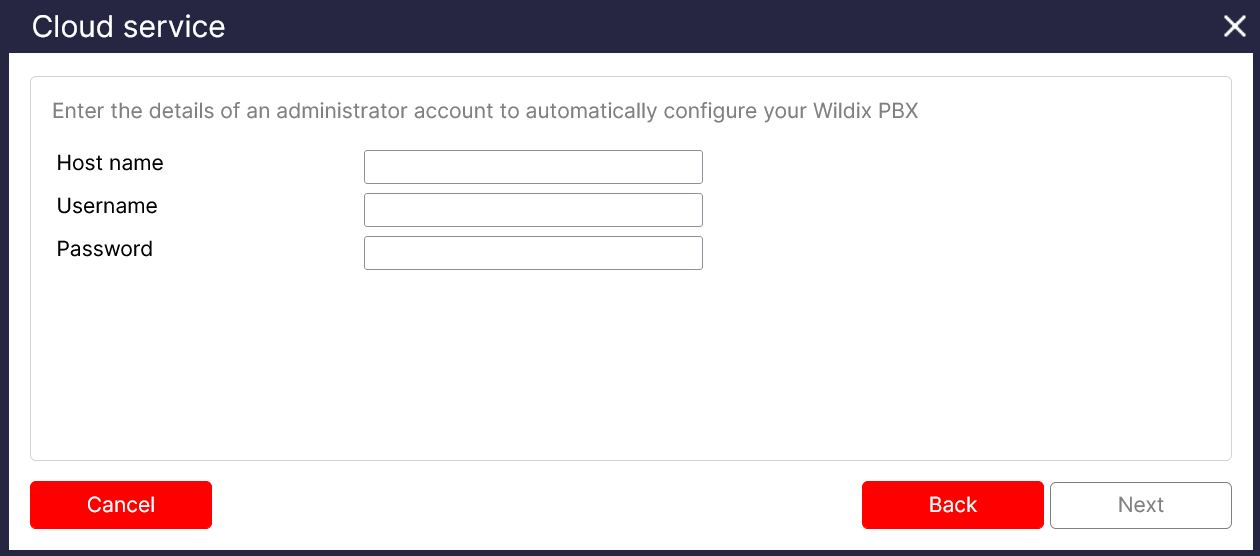
Enter your Wildix PBX URL into the Hostname**, e.g. http://yourcompany.wildixin.com
Provide the username with Admin access to your Wildix PBX.
Enter the password for the Admin account
Once the wizard has finished you are all setup to collect data from your Wildix system!
Manual setup
If you want to modify your Wildix PBX on your own, follow the instructions below.
You will need Tri-Line's OpenCDR tenant to get the live CDR information from the Wildix. To obtain this, please contact our Support Team.
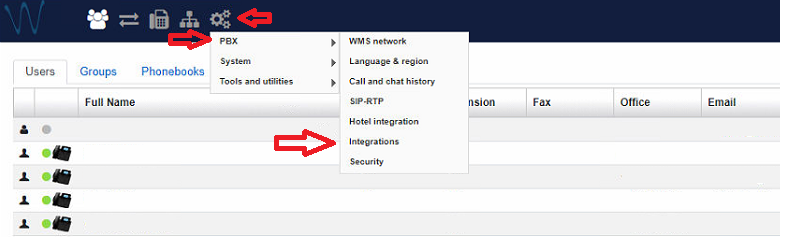
Integration screen
After obtaining your OpenCDR tenant, log in to your Wildix system and go to the Integrations section, as shown below.
Callback URLs
Set up the Server to Server application to acquire basic Call Detail Records (CDR) and the Callback URLs, enhancing the information available for reporting.
The first screen you will be presented with is the Callback URLs subsection. This will send events to our OpenCDR service. This service will allow TIM Plus to collect these details to enhance your call reporting.
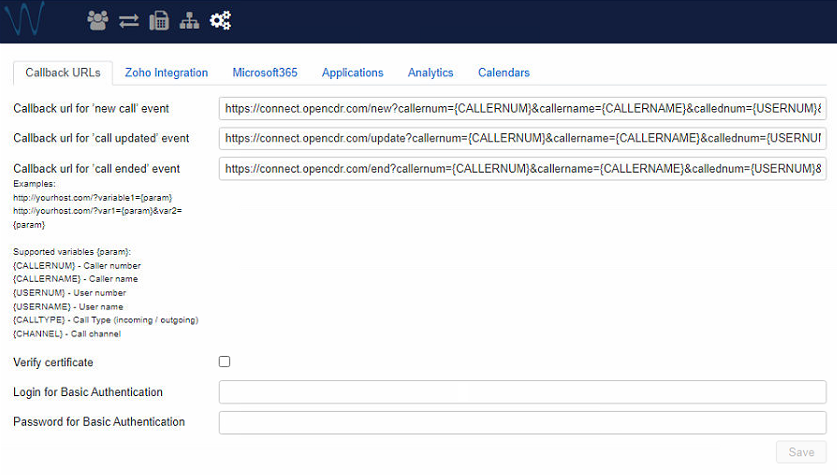
In this section you will need to configure the Callback URL locations, so the events can be sent as below.
Callback url for 'new call' event:
https://connect.opencdr.com/new?callernum={CALLERNUM}&callername={CALLERNAME}&callednum={USERNUM}&calledname={USERNAME}&type={CALLTYPE}&channel={CHANNEL}
Callback url for 'call updated' event
https://connect.opencdr.com/update?callernum={CALLERNUM}&callername={CALLERNAME}&callednum={USERNUM}&calledname={USERNAME}&type={CALLTYPE}&channel={CHANNEL}
Callback url for 'call ended' event
https://connect.opencdr.com/end?callernum={CALLERNUM}&callername={CALLERNAME}&callednum={USERNUM}&calledname={USERNAME}&type={CALLTYPE}&channel={CHANNEL}
To be able to send these events you will need a valid Basic Authentication Login / Password for our OpenCDR services. Please contact Tri-Line's support team if you do not have these.
Once all these settings have been added don't forget to Save!
Server-to-Server Application
On this screen an application needs to be created to allow TIM Plus to collect the CDR data from the Wildix.
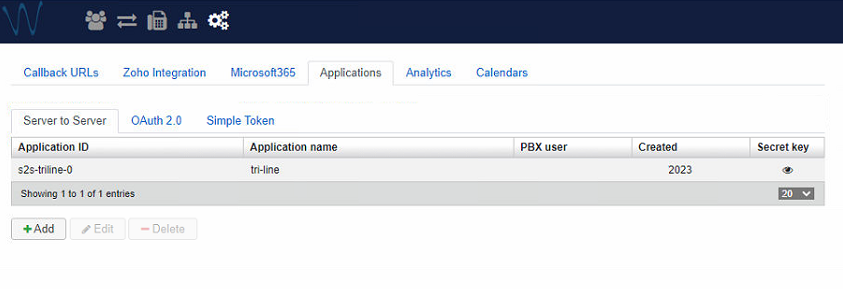
To create a new Server to Server application click on Add and then set the Application name as tri-line.
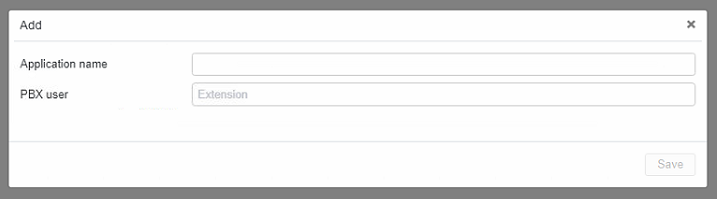
The PBX user needs to have writes to access the CDR system. The easiest way would be to select a user who is part of the Admin group.
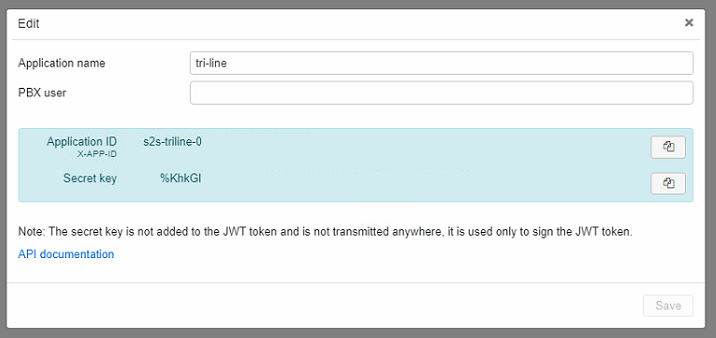
Once the application is added, click on 👁 and copy the Application name, Application ID and Secret key for use during the TIM Plus setup.
TIM Plus
Now that the Wildix is configured, we need to create a Site in the TIM Plus directory to start collecting data. Press the Add button and select Cloud service then select Wildix. Enter a . into each field and press Next. This will then let you press the Manual Entry button.
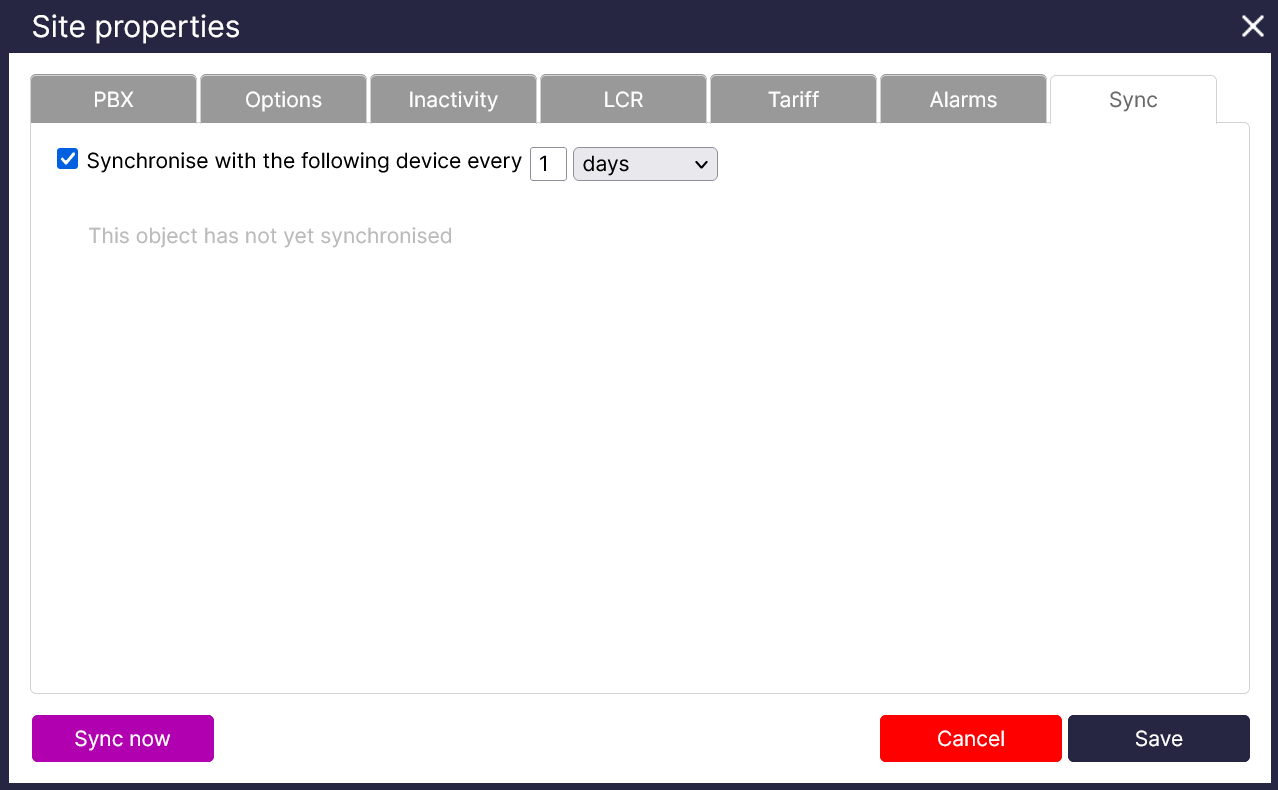
Sync config
Select the Sync tab in your Site properties window and tick the Synchronise with the following device every X days checkbox. You will also need to select a time period for your site to Synchronise with the Wildix, we would recommend once every day.
PBX config
This is where the properties saved from the Wildix need to be added.
Add your Wildix PBX URL in the Host, so TIM Plus knows where to connect for data. You should remove http:// from the front of your URL! This could be for example: yourcompany.wildixin.com
Add the Application ID from the Wildix Server to Server application into the ID field
Add the Application name from the Wildix Server to Server application into the Name field
Add the Secret key from the Wildix Server to Server application into the Secret field
Enter wss://connect.opencdr.com/ws into the OpenCDR websocket URI field
Enter the Basic authentication username used during the Callback URI stage into the OpenCDR websocket Username field
Enter the Basic authentication password used during the Callback URI stage into the OpenCDR websocket password field
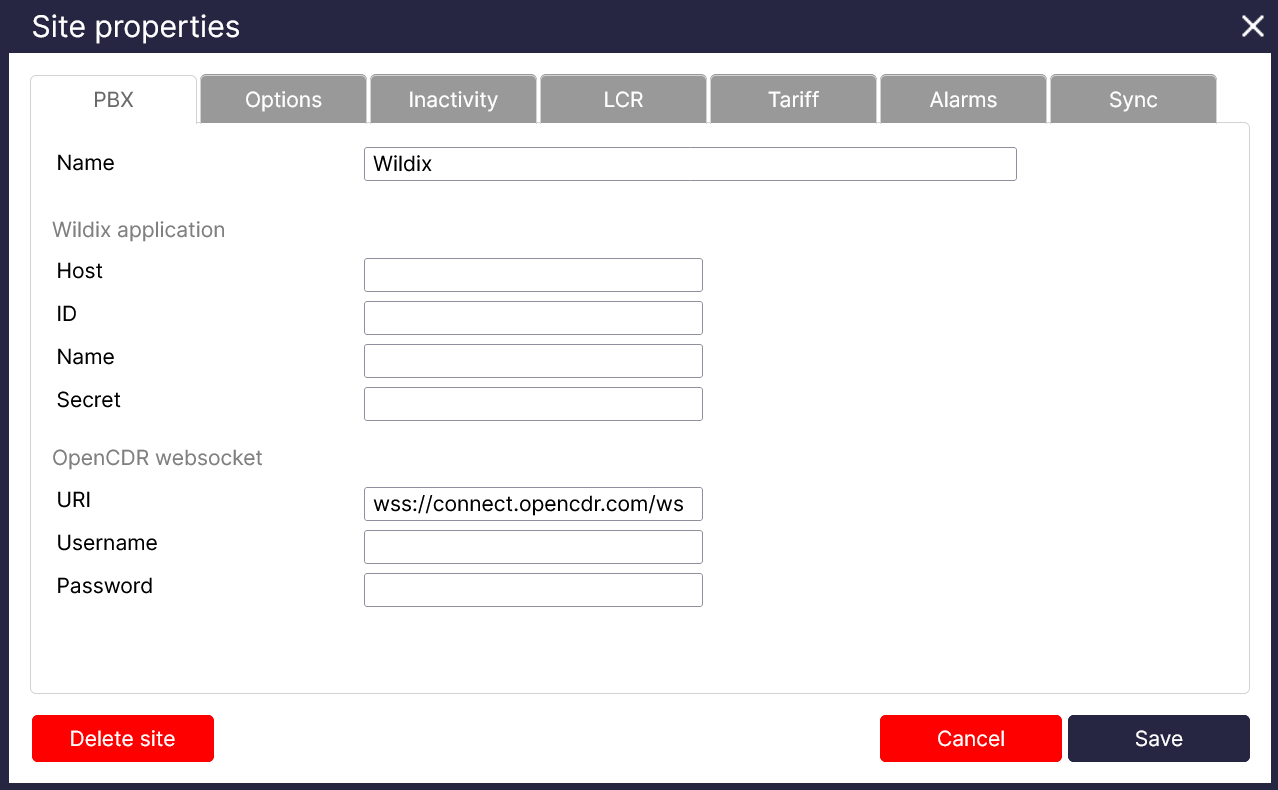
This completes the Wildix setup for TIM Plus. Don't forget to press Save!